


Filling order data
How to fill in new order data?
after adding new order from the side list -> then customers -> then customer list,
Or reaching the order through the side list-> Orders -> Orders view, you will be redirected to the order page to fill in the data as follows:-
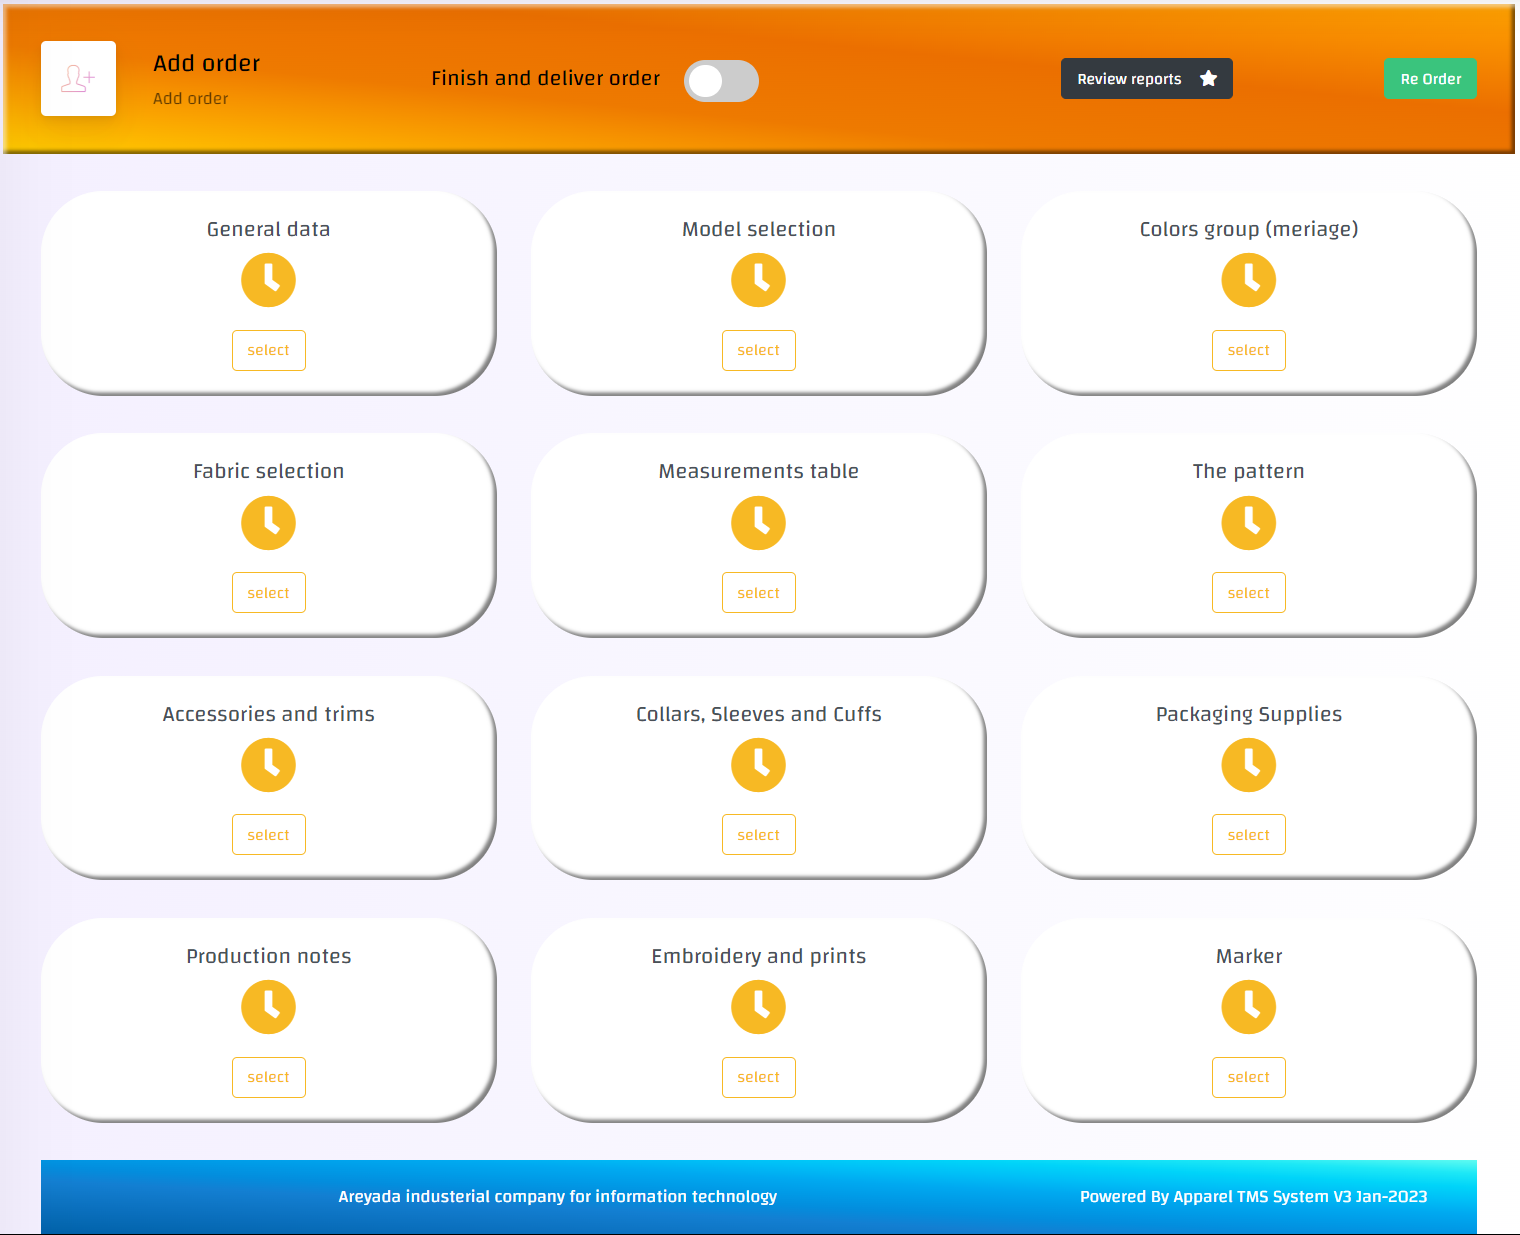
1- General data
Including the order general data [Model selection | Collection name | production site | Season (eg, summer) | Gender (eg, male) | The shipment date | Delivering date]
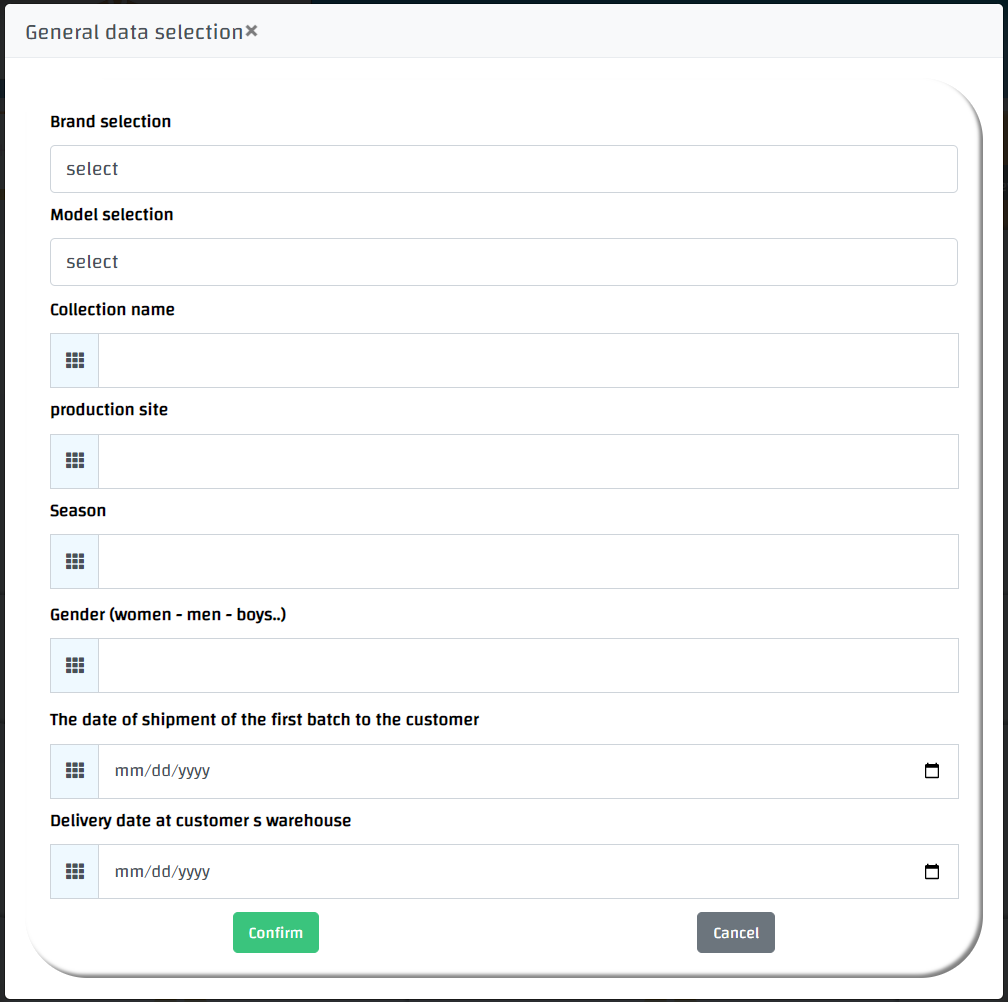
- Fill in the required data and press confirm
2- Model selection
Including the model details [main category (eg, upper section) | Subcategory (eg, t-shirt) | model picture]
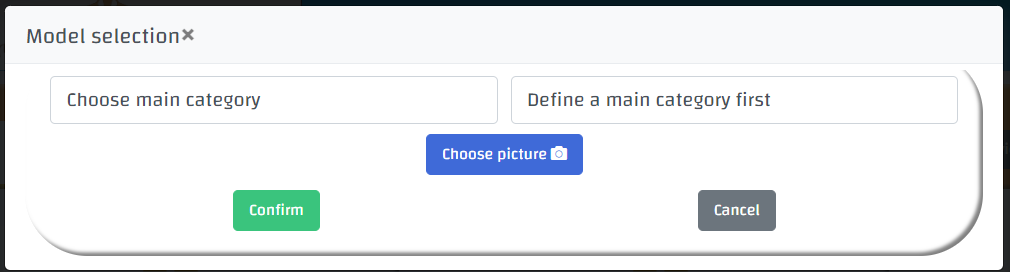
- Fill in the required data and press confirm
# You can add new main category or subcategory through the side menu -> System configuration -> Main Settings
3- Colors group (meriage)
You can write any details related to the model, such as description, colors, etc., along with the detailed model image [notes (written details) | model picture]
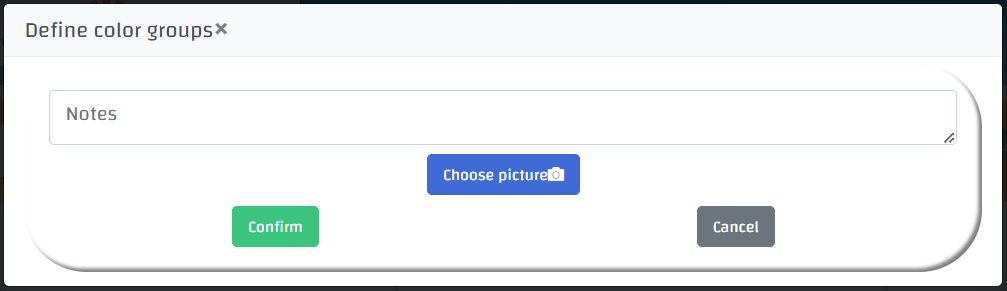
- Fill in the required data and press confirm
4- Fabric selection
Including the used fabric details [number of fabrics | Usage (eg, inlay) | fabric combination]

- Fill in the required data and press confirm
# You can add new fabric by pressing add new fabric or through the side list -> then fabric combinations -> then add fabric combinations
5- Measurements table
You can choose the size table from the size tables library
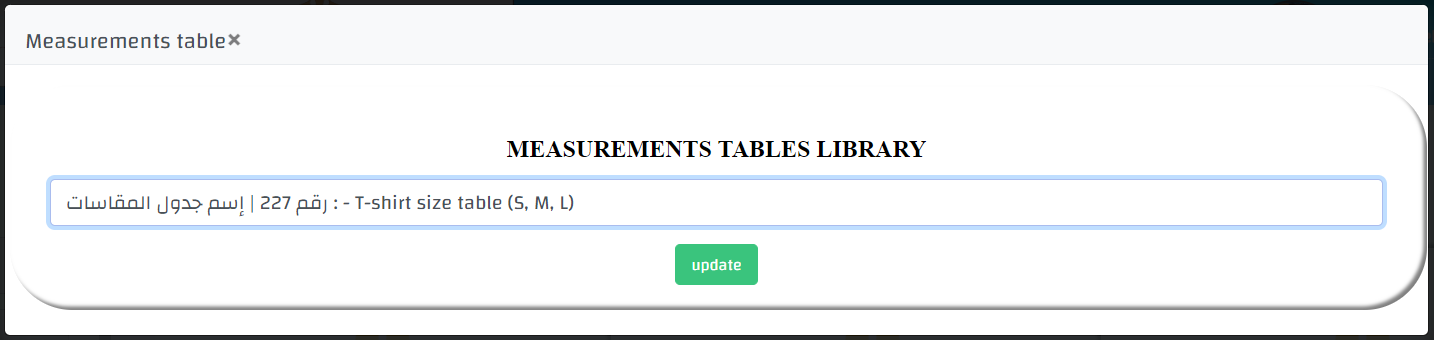
- Select the table and press update
# You can add new measurements table through the side list -> then Measurements table -> then Add measurements table
6- The pattern
where sizes and quantities of orders are added

- You can add details by clicking on Add, and you will be redirected to a new page to fill in the data
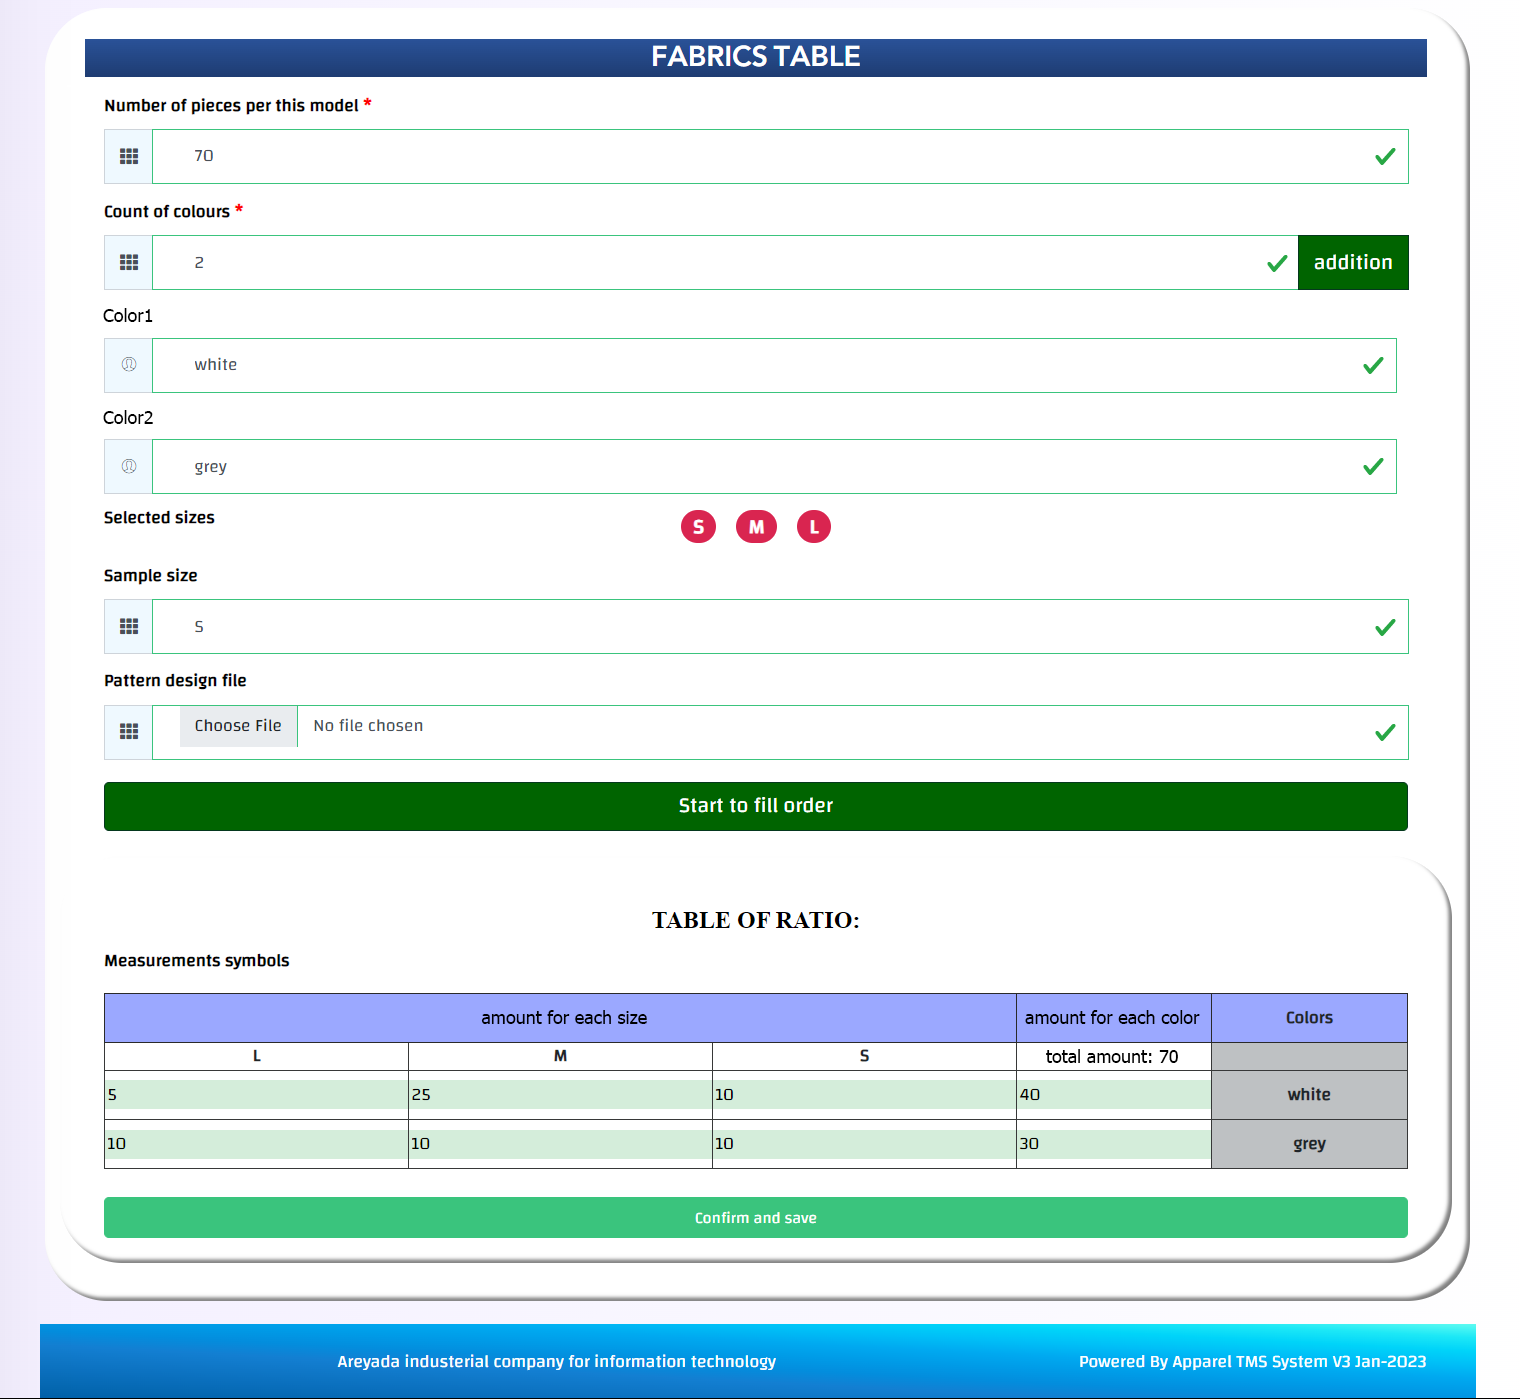
Including these data [Pieces number | colors | sizes (from measurements table) | Sample size | ] Fill in the required data and press Start to fill order, And add the amount of each size and press confirm and save
- The quantities can be easily modified by clicking on the Modify Table Data button
7- Accessories and trims
Including all used accessories such as thread, elastic, buttons, and others
To fill in the data of one of the accessories, add the amount and click on addition and fill the data as follows:-
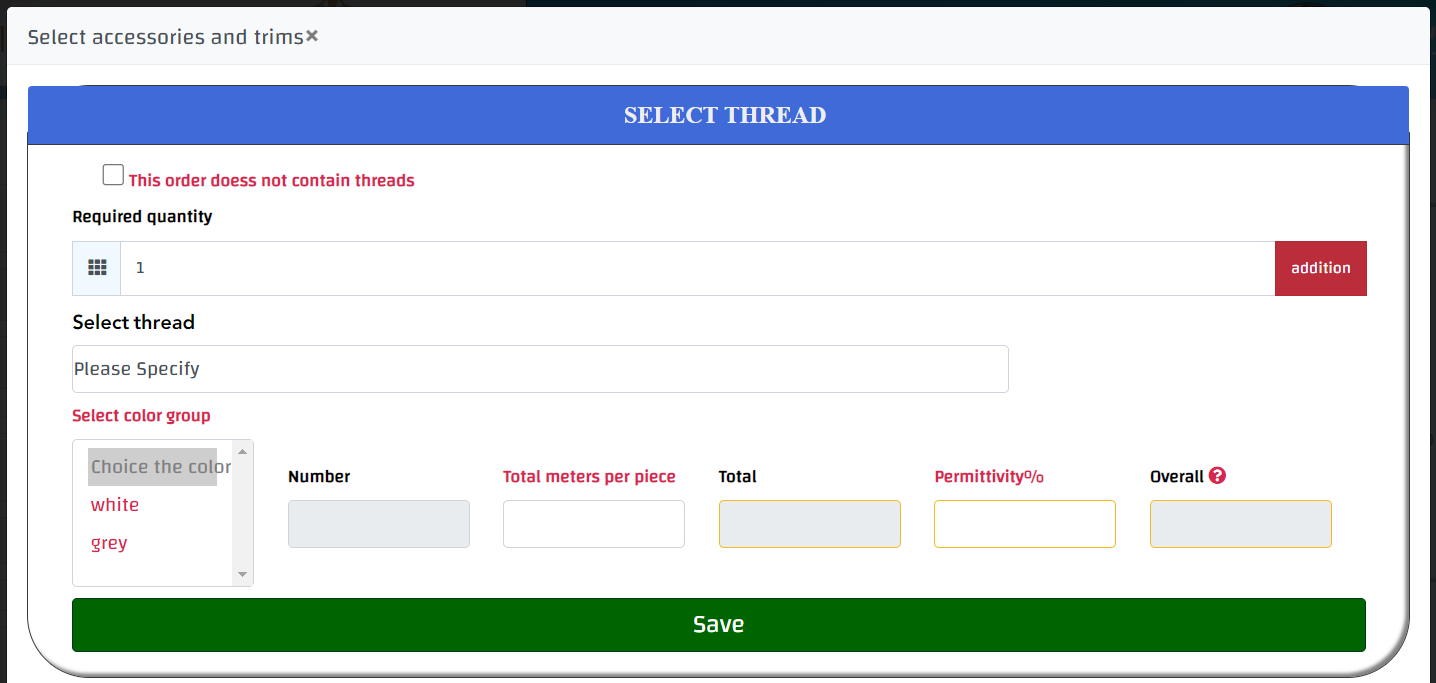
– Choose the required accessory and choose the color, and the number of the pieces will appear (which is added to the pattern table), then add the quantity used for one piece, and the amount required for the entire order will be calculated automatically, and by adding the allowance percentage or waste (for example 2%), the total required amount will appear, including the percentage of waste, and press save
– In case you want to use the same accessory for a several colors, you can select them by pressing ctrl, and the total number will be collected automatically
# You can add new accessory through side list -> then design -> then Accessories and trims
8- Collars, Sleeves and Cuffs
Including Collars, Sleeves and Cuffs data; and you can fill in data as it is in the accessories
# You can add new one through the side list -> then design -> then Collars, Sleeves and Cuffs
9- Packaging Supplies
Including Packaging data such as labels, packaging and others; and you can fill in data as it is in the accessories
# You can add new one through the side list -> then design -> then Packaging Supplies
10- Production notes
You can point the types of stitches, Seams, or production notes on the model picture
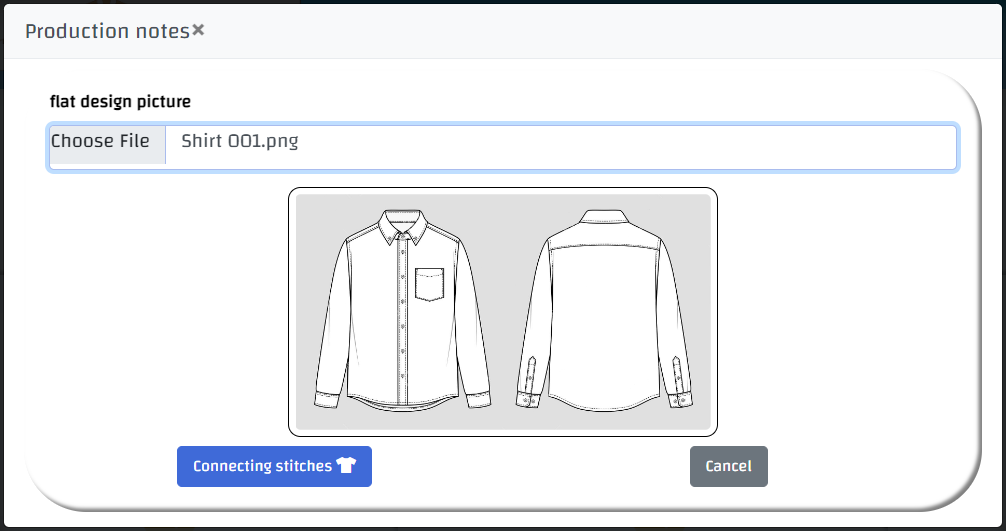
– Choose the image and press Connecting stitches, and you will be redirected to a new page to fill in the data as follows: –
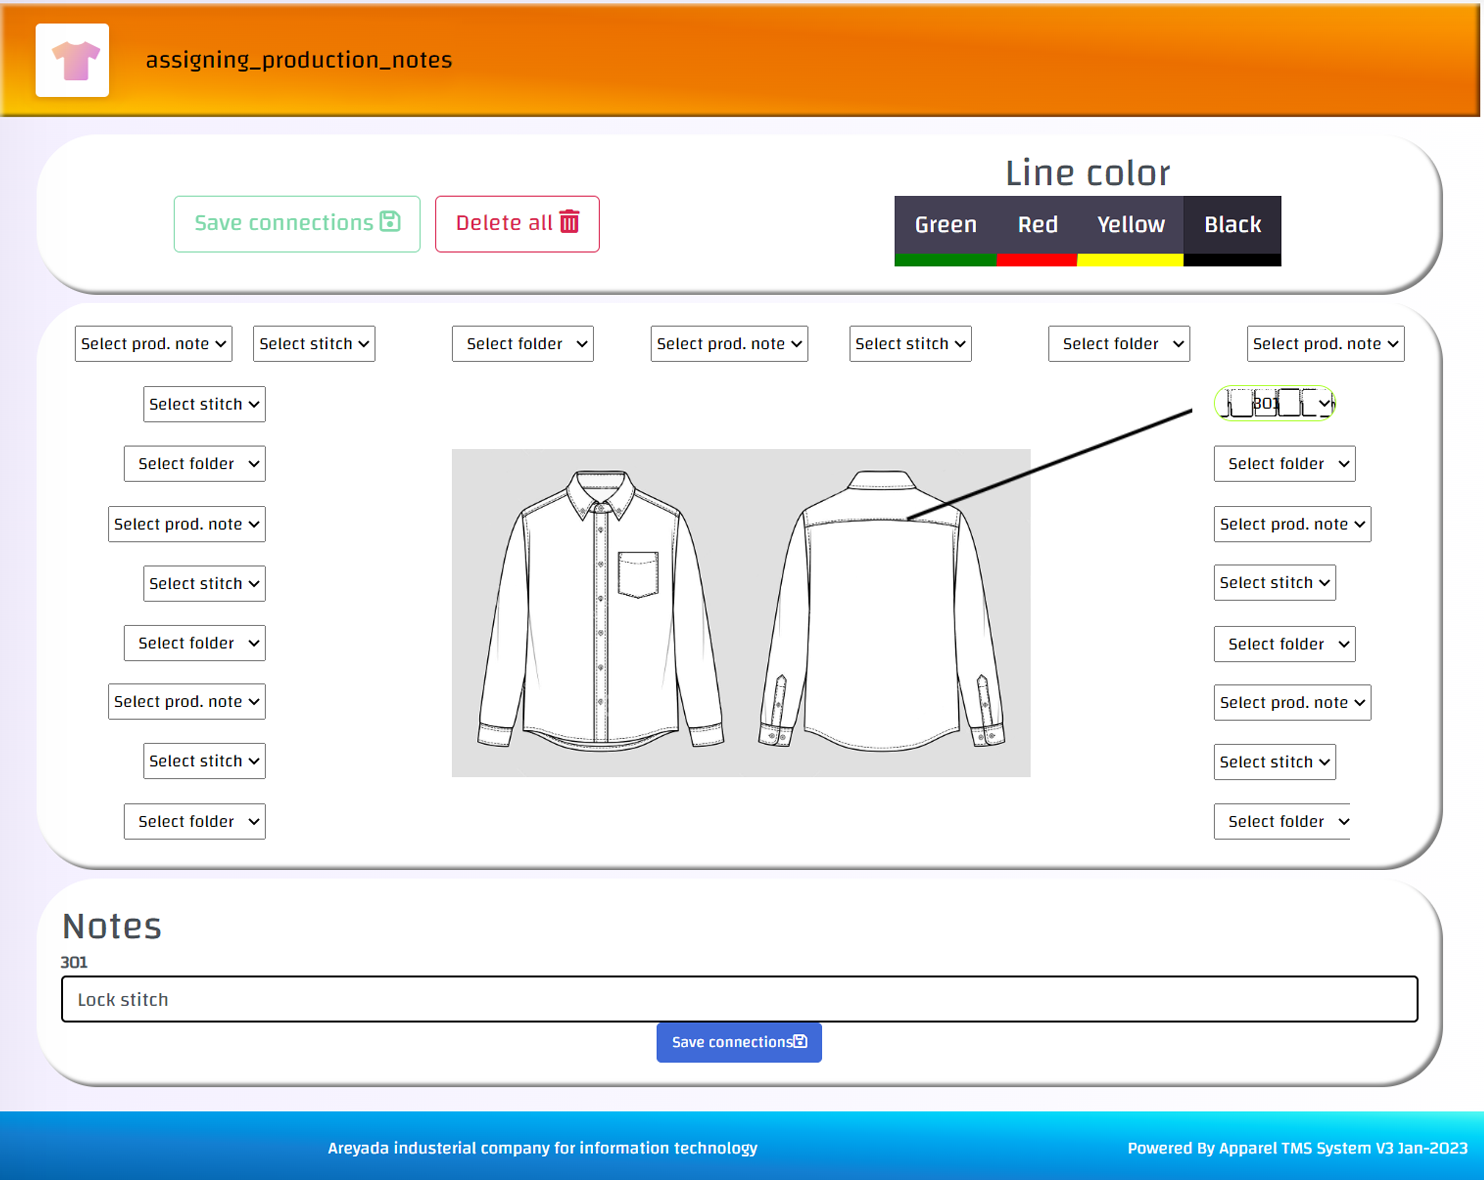
- To point to any place and add a stitch, seams, or production note, follow these steps:
1- You can choose arrow color the four available colors
2- Choose the stitch, seam, or production note you want to point to from the drop-down list (make sure that the mouse cursor appears as usual and not the + sign), then drag the arrow to the target place
3- press on save connections, and a text box appears for adding more detailed notes
4- After finishing adding all the stitches, seams, and notes, click on save connections
#You can add a new stitch, seam, or production note through the side list-> System configuration -> Add and modify stitches / Add and modify Seams / Add and edit production notes
11- Embroidery and prints
Including embroidery and prints used in the order [Length | Width | Thickness ], and you can fill in data as it is in the accessories
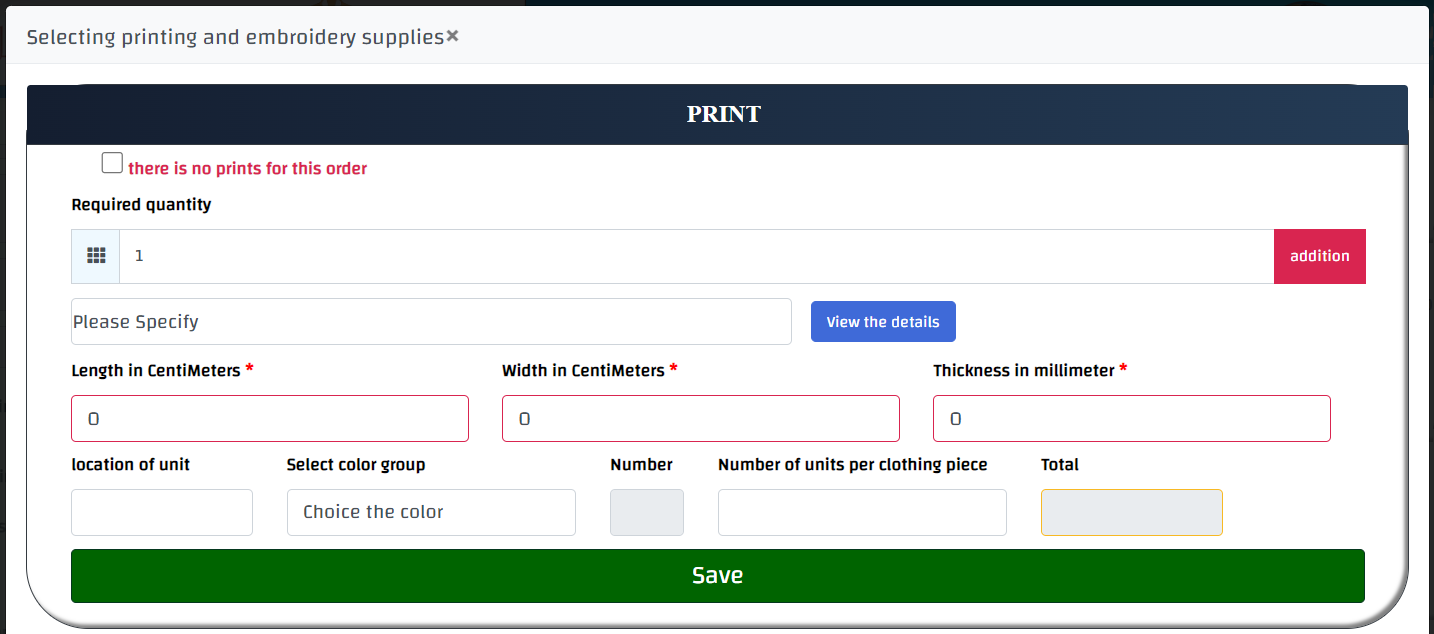
- Fill in the required data and press save changes
12- Marker
Including marker data for the fabric used in the order [Marker Layer Count | fabric | color | permittivity]
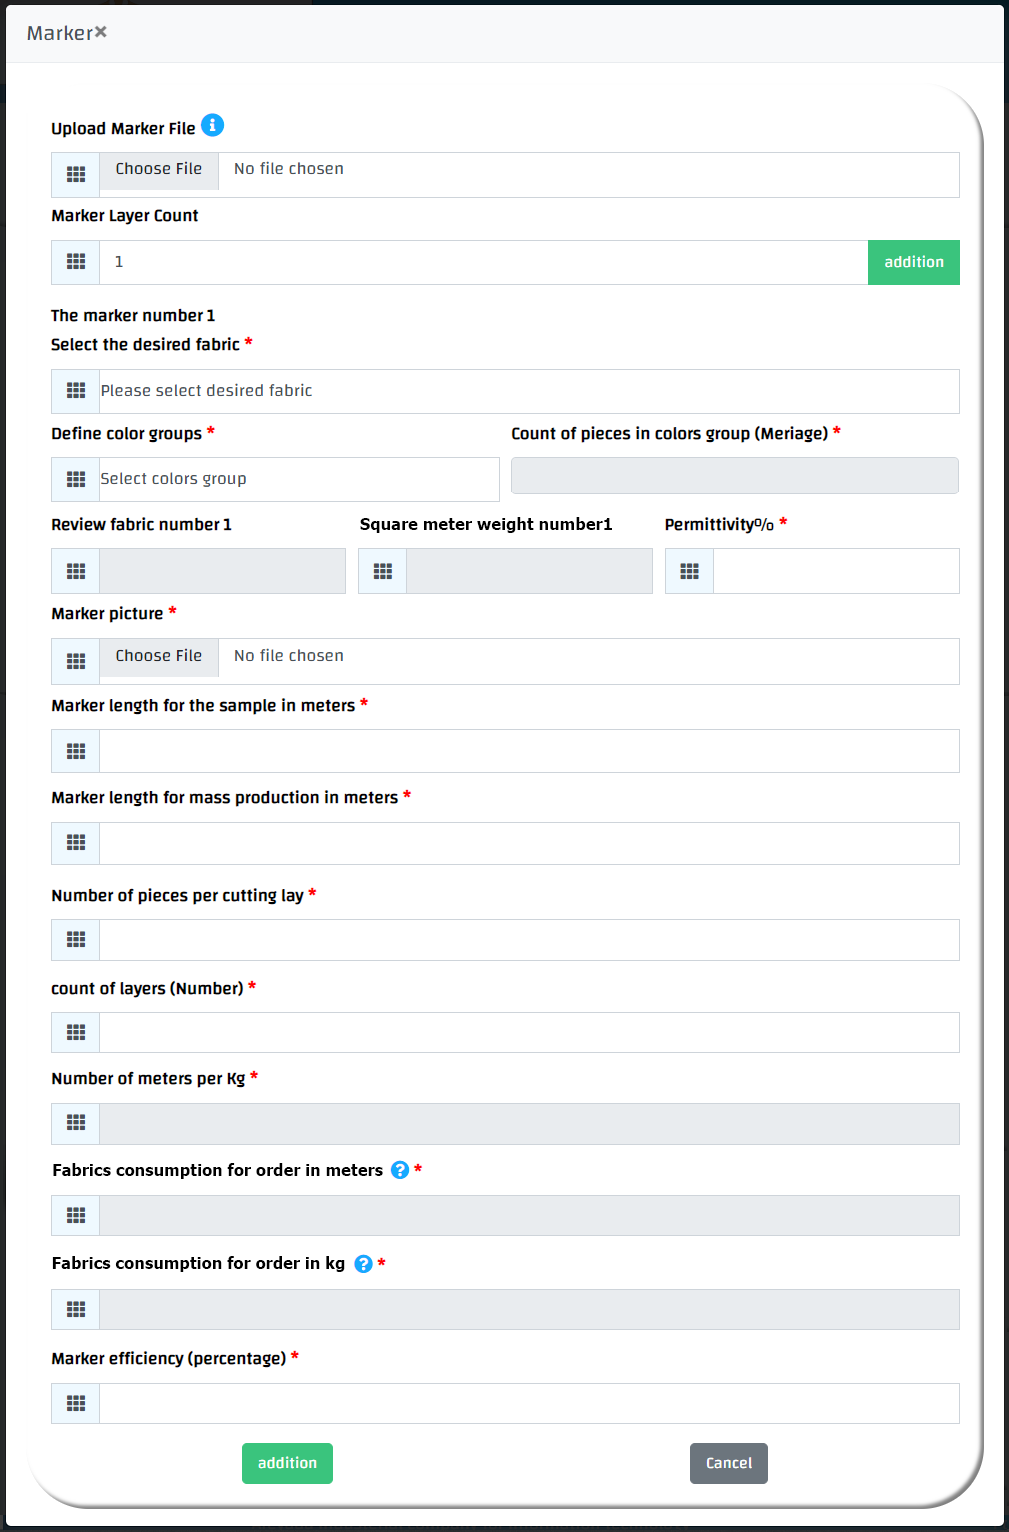
- Fill in the required data and press Add
After completing all the order data, click on Finish and deliver order, and you can review the reports from review reports
